January 24, 2014

I love shredded items, mostly denim, as it gives a harder edge to basic pieces and after seeing an influx of denim coming up, I decided to do my own DIY on some shredded shorts and thought I'd share it with you step by step.

What you'll need:
A pair of old/new denim shorts of your choice (Similar to mine here)
A pair of heavy duty fabric scissors
A large pair of tweezers (Small will do if you can't get larger ones)
Hook
Seam ripper (Seen later)
Pins

First off see where you want the cuts to be (I had previously cut these so these are shorter then the original)

I rolled mine to the length I wanted and fixed them in place with pins along the top line. This allows me to see how even they'll be and a easier guideline for the next step.

Once pinned, lay them flat and arm yourself with those scissors. Now my technique to cut both sides at the same time is to go about 2cm from one end and cut as close as you can to the bottom edge, trying not to leave any material joined apart from the stitched inner seams which are too thick when folded to cut. If there is any material webbing between where you have just cut, go ahead and snip them as it'll leave you with the two thicker seams. Before removing the pins, it should resemble a 4 layer sandwich of denim (see below). Remove the pins and unroll and you'll be left with something that looks like 2 huge rips being held together with the two overlapped seams which you can now easily cut through leaving you with something that looks like this.

So now you should be left with a pair of cut off shorts something like these.

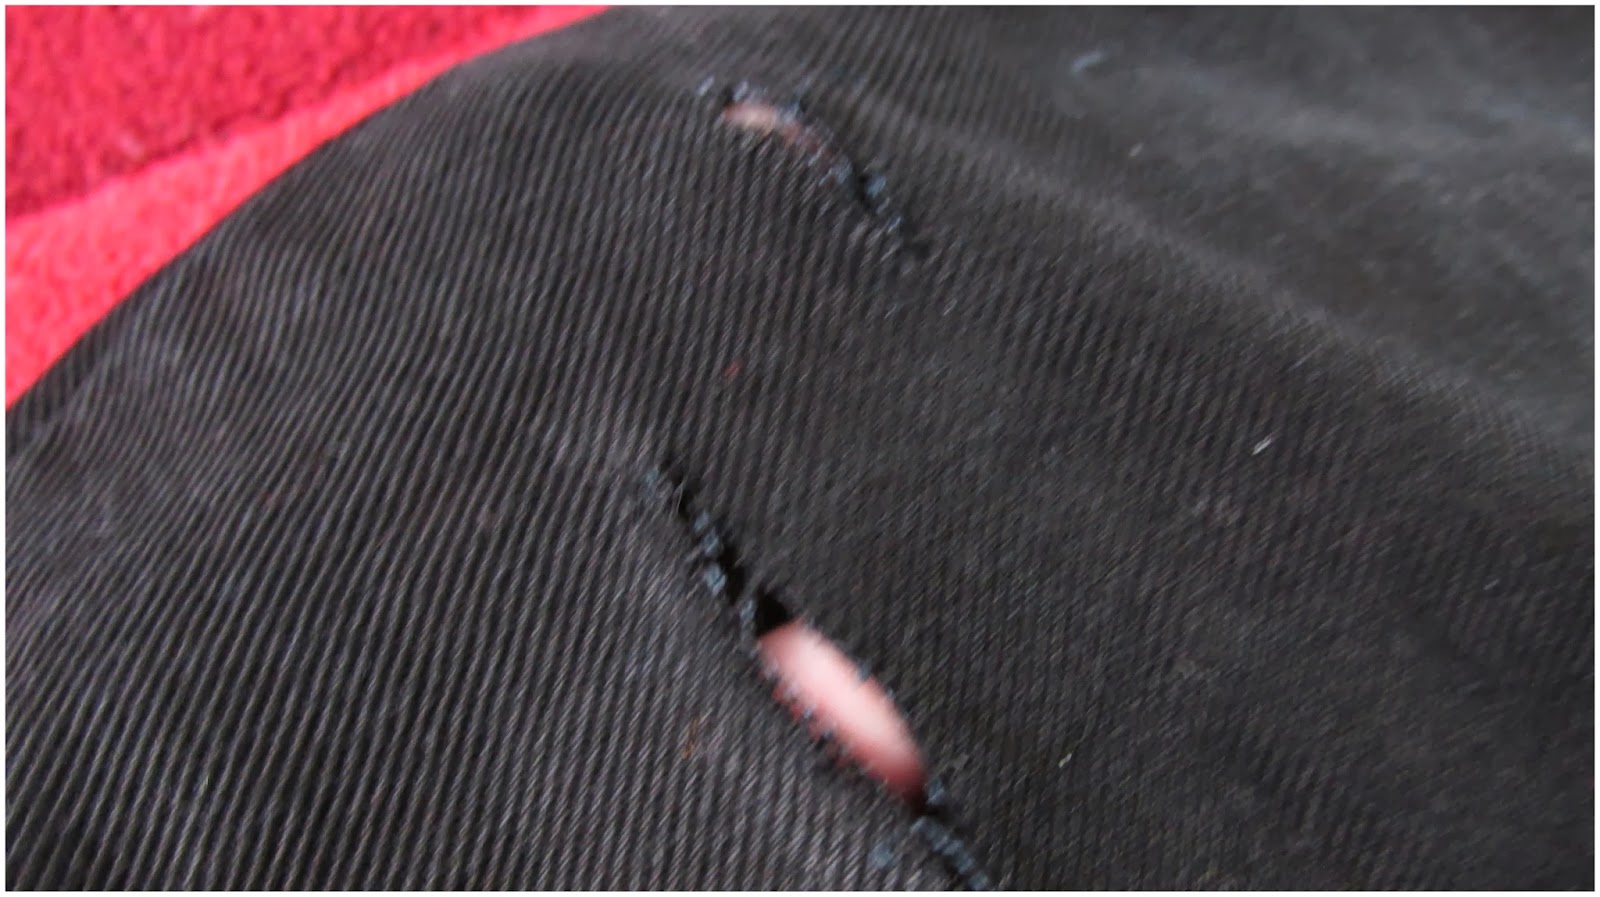
Now its time to grab your tweezers and pinch along the cut off line.

The larger threads will fray along the line to give you a worn, vintage look, whereas if you go a couple of cm's above the line and pull, you'll create the shredded denim 'bridging' where it has become separate but not broken off, like the fraying.


One leg done. As you can see, you can always go back and do more to it, like I will in the end but this gives you the initial image of what I mean by bridging and fraying.


This is both sides done (including the back) which takes a fair amount of time with small tweezers (expect to be there about 2-4 hours depending on how much distressing you want) but with larger tweezers this took around 90 mins to do. Now you can either leave the shorts like this, or you can do what I did next and create holes in the main part of the shorts too to give it that real worn in look.

To create this, you'll need to get a seam ripper, which makes this a lot easier (Its okay if you can't get one, you can use scissors by measuring how long you want the rip and pinch in the middle, snip in the centre and gradually cut along the line and then follow the oncoming steps) With a seam ripper, you get a more even line. To create the gaps I made, I stuck the seam rippers pointed end in the denim and brought it back up to the top, almost like when pinning items, and then pushed across which created an even hole. To then widen that, I used the seam ripper again to push again against the line and it slices through the denim with ease.
The holes created with the seam ripper, almost like button holes. To then create the bridging, grab your tweezers again and pull against each side to gain the most material which should look a little something like this.

I didn't want to go too overboard with these as taking too much material away would spread the size of the rip.


These are the images of the final product which I'm super happy with. To get the more worn in look, chuck these in the washing machine following the recommended washing instructions which will create a 'fluffier edged' fray. Also as well, if pieces of fray are too long, you can alter them using the scissors to a more preferred length. You could also add additional effects such as studs or you could also bleach these either by dip dying them into a bucket of bleach and water (Half bleach half water) or you could create a more tie dye effect using the same mixture in a spray bottle.
I hope you liked my first DIY as I was a little apprehensive about doing it but decided yesterday to finally bite the bullet to do it which now I'm glad about.
Let me know in the comments below if you'd like to see anymore DIYs or your attempts on similar projects to this.


2 comments
Cool how-to! I've used a cheese-grater & sandpaper on my jeans in the past to get a distressed look too. Not enough guys are brave enough (or motivated enough) to do something like this.
ReplyDeletethought id give it a try and show guys can do DIY's too, probably gonna do some more throughout the year too
Delete